IR over IP
If you remember back to my post about the hellish time I had with the CCTV DVR I set up last summer, you’ll remember how eager I was to expand the functionality and climb over some of the obstacles created by the awful software that comes loaded on the boxes. In that vein, one thing I’ve been meaning to do is get one of those IR repeater things that allow you to control such appliances from a different room, usually by converting the IR signal from a remote into an RF signal, then back to IR in the desired room.
But, why buy when you can build and blog about it huh? The DVR shipped with a cheap nasty little remote that didn’t even work when I first came to look at this project - the diode at the top was attached so badly (a dry solder joint) that I needed to exact some repairs before even getting started.
The Plan
The plan is to have a device to receive the IR signal downstairs at the TV, transport it over Ethernet to the loft space where the DVR lives, then transmit it as though the remote was being used in the loft:
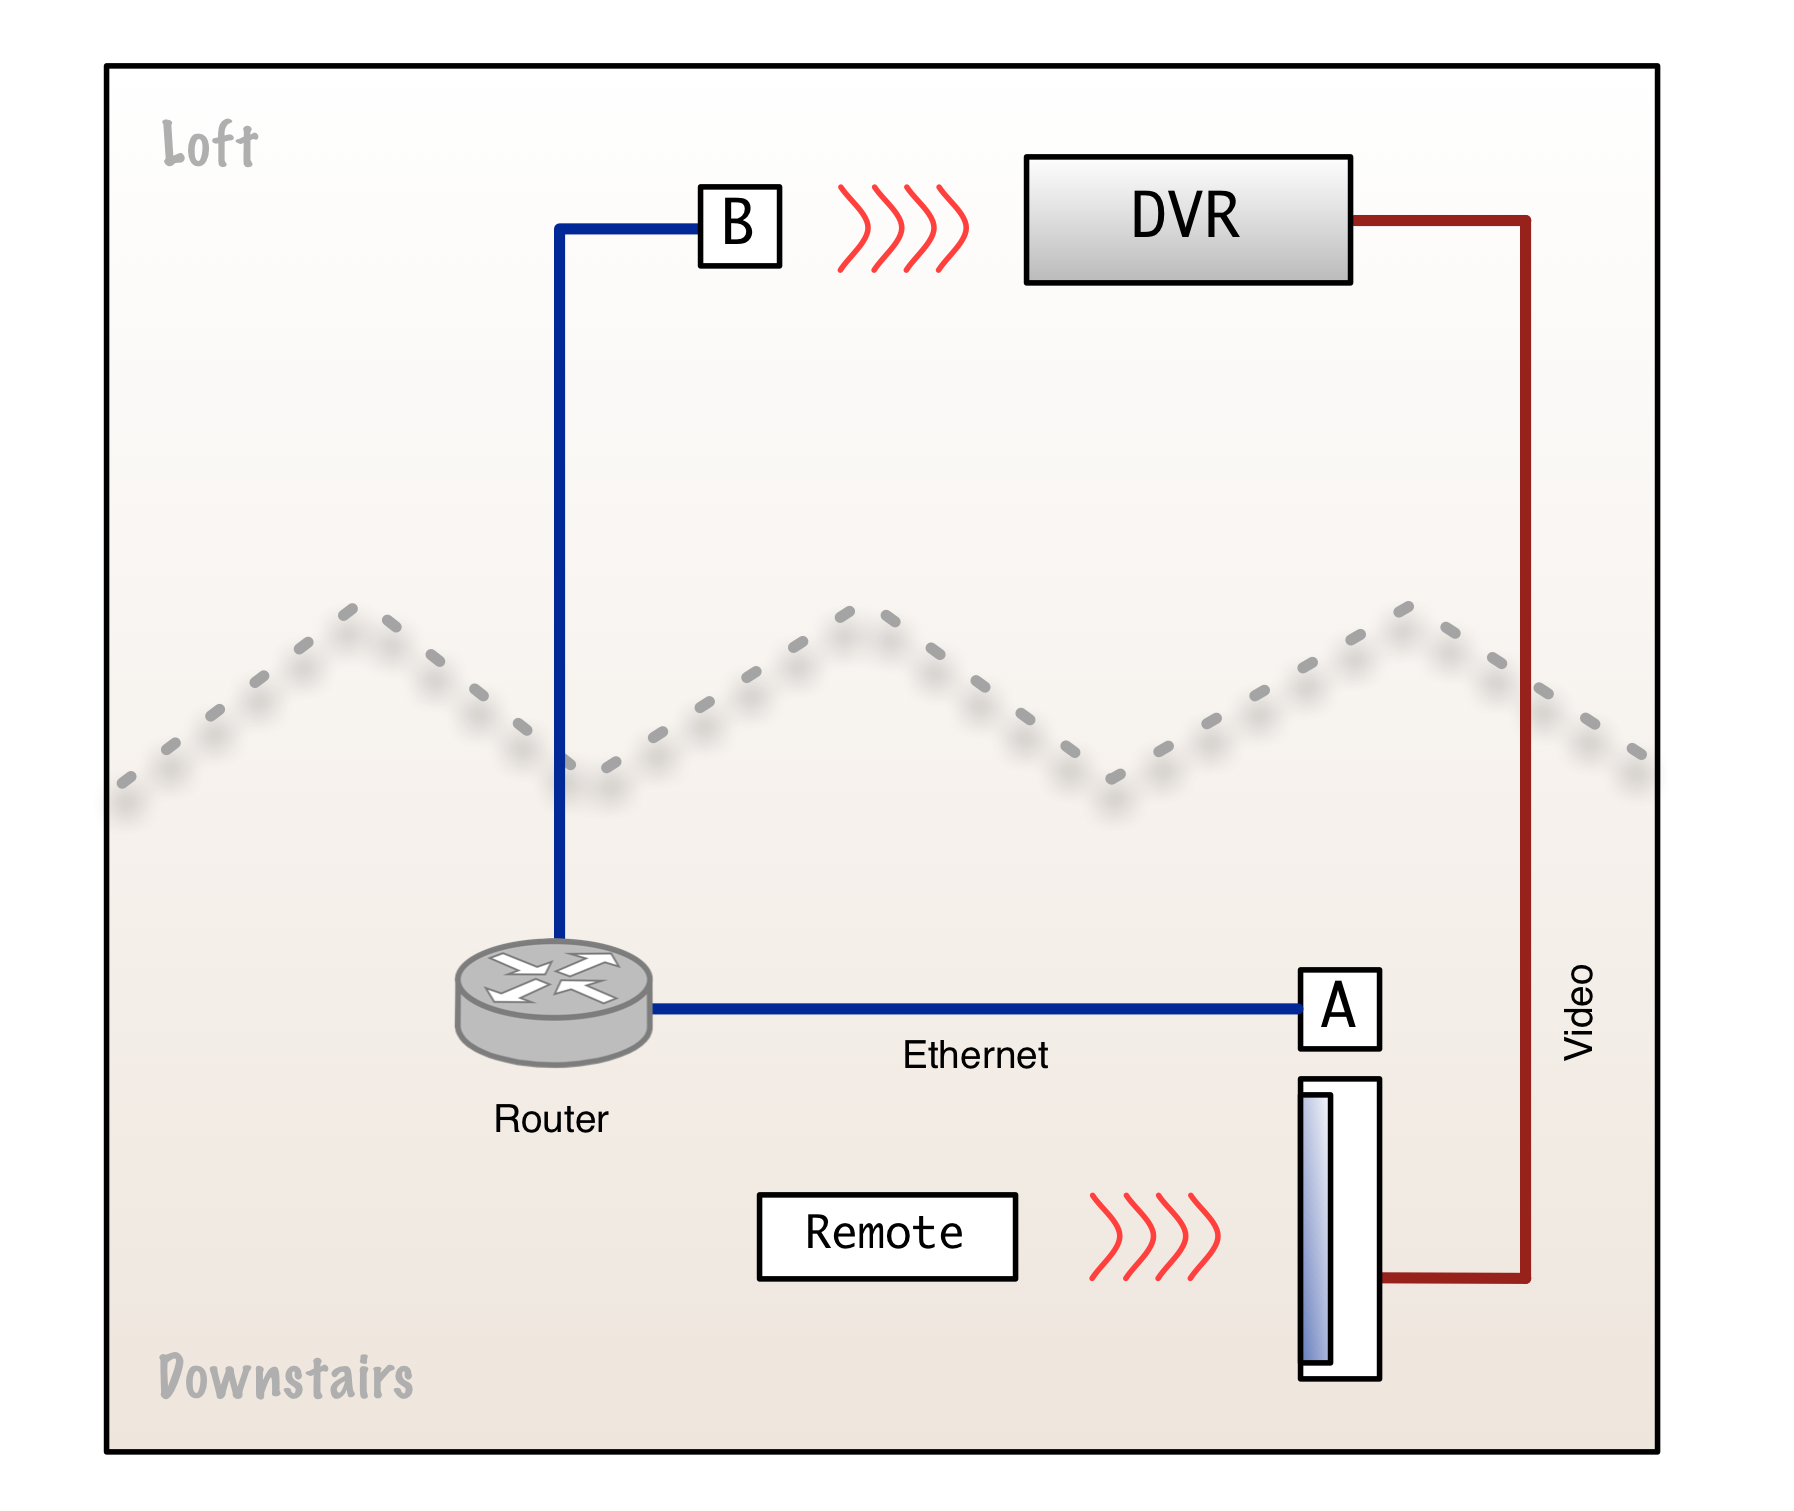
Since the house is already nicely wired for Ethernet, it seems the most sensible way of transporting the data to the loft. I could have done something fancy with 802.15 (Zigbee) but I don’t really want to tie up any of my XRF or Xbee modules on this.
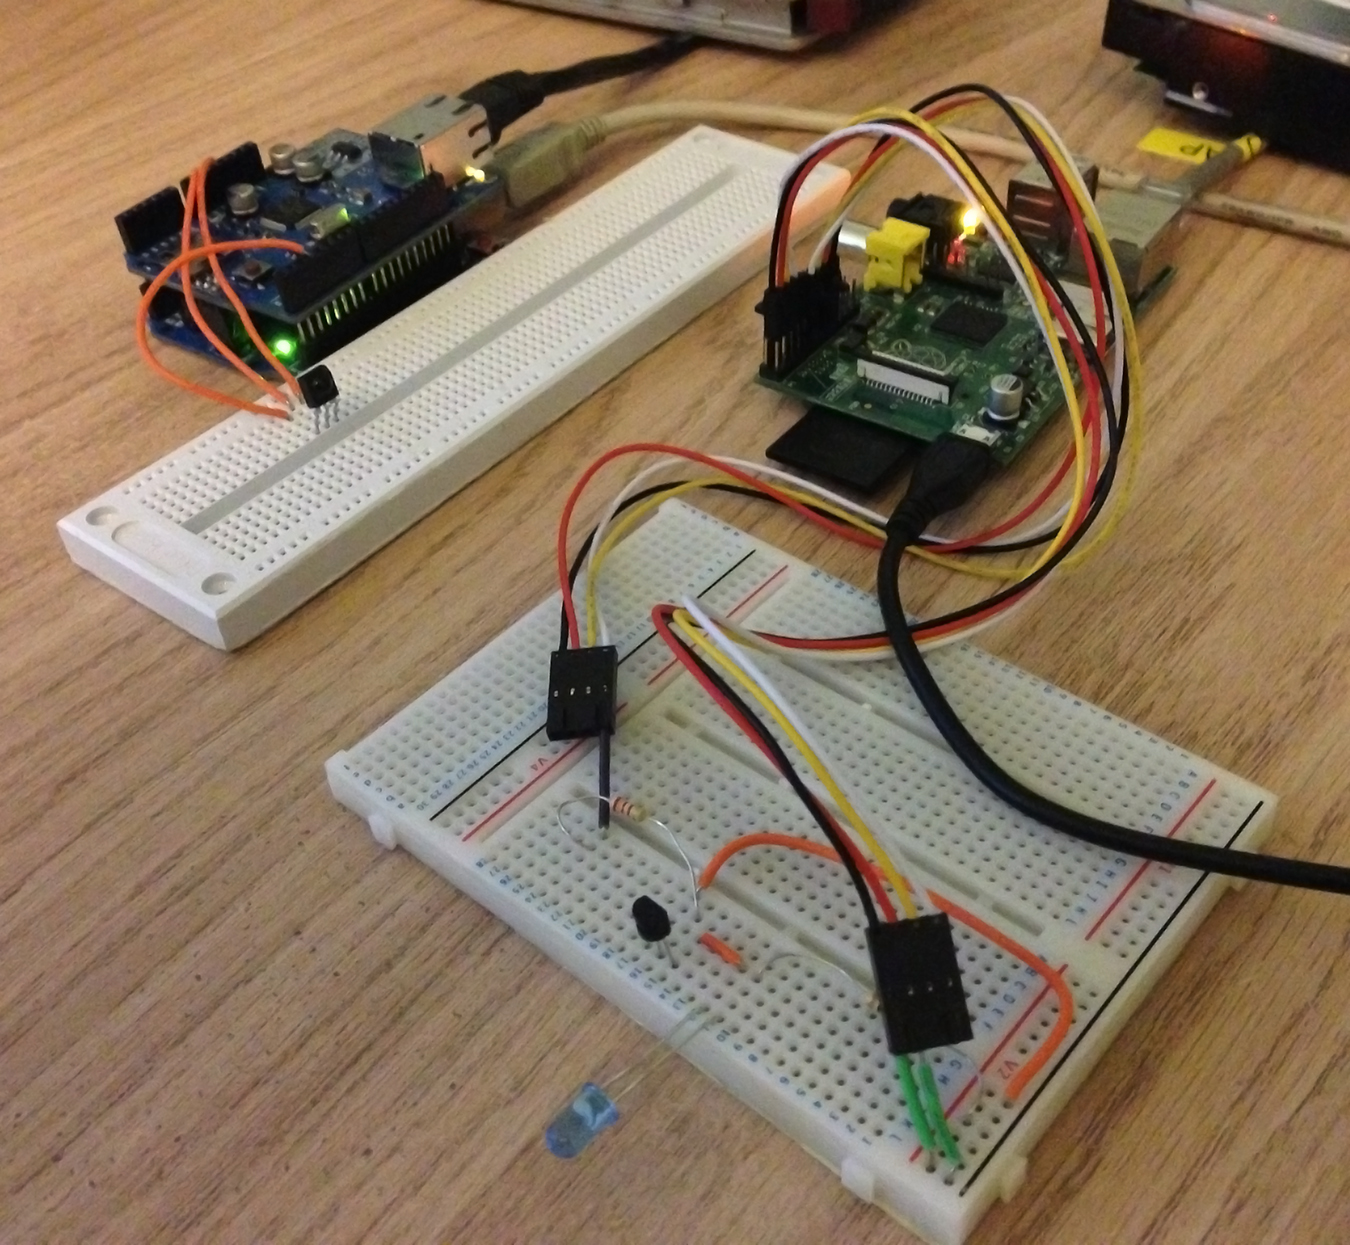
A will be an Arduino, fitted with the Ethernet shield and connected to an IR detector (which I actually ripped out of an old Sky+ box). B will be a Raspberry Pi. My Pi spends most of its time connected to Ethernet and Power and nothing else, so it won’t be missed in the loft and it can continue doing the things it does now. The Pi will have an IR emitting diode attached to it to simulate the DVR remote being used in the loft space.
The IR Receiver - “A”
The receiver is quite straightforward electronically speaking. The detector is connected to the Arduino directly with no interstitial circuitry. Looking from the front (the business end, so to speak) - the centre pin is Ground (0V), the rightmost pin is 5V and the leftmost pin is the output - which I connected to one of the digital inputs on the Arduino board.
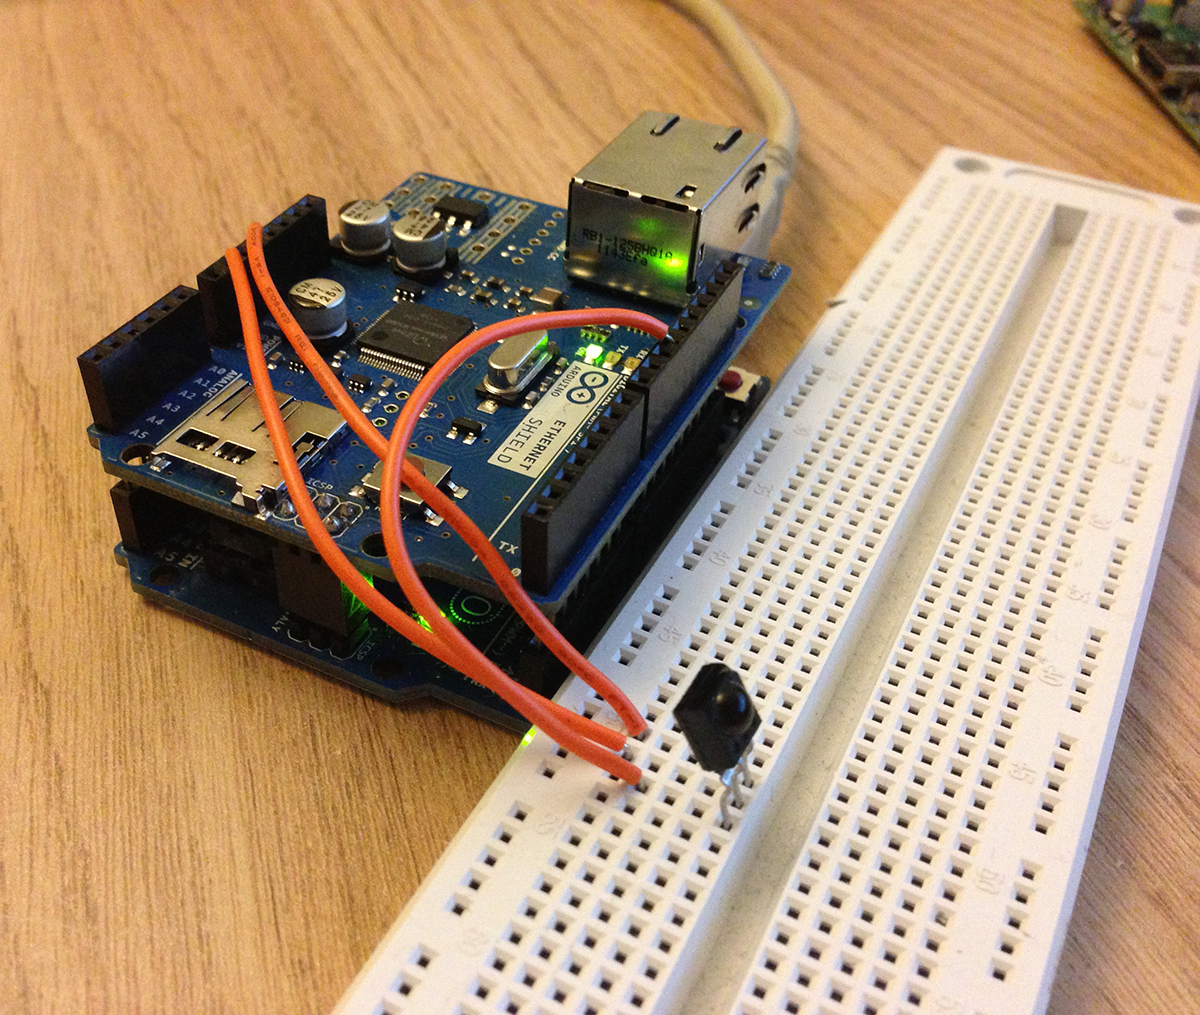
I’ll probably find a more suitable way of connecting them without the breadboard before I deploy the project to the loft/downstairs media center area. The code for the Arduino side of things is quite simple, I will psuedocodeize it here for simplicity, but you can view it on GitHub too:
detect incoming IR codes
if code is valid then:
    make HTTP request to raspberry pi with the code
Each time the Arduino receives a valid code using the IRRemote Arduino library (here is the library on GitHub), it makes a HTTP request to the Raspberry Pi in the form:
GET /?code=SOME_CODE_NAME HTTP/1.1
The Raspberry Pi then performs the appropriate actions to transmit the code sequence for SOME_CODE_NAME.
The IR Transmitter - “B”
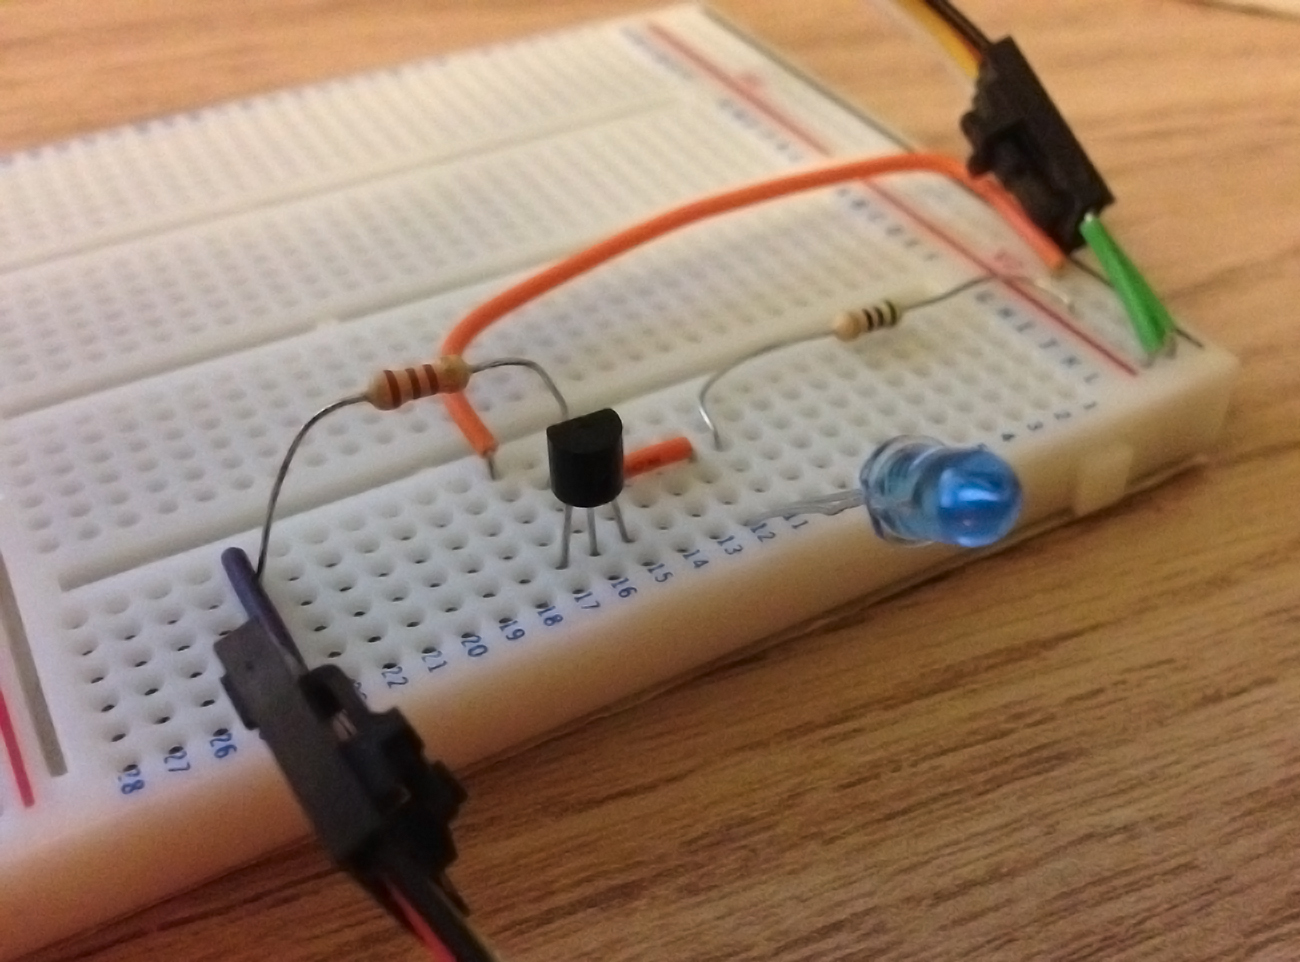
The first actual step was creating the circuit for the IR transmitter. This is really the more challenging bit of electronics of the two (but still not really challenging). The Raspberry Pi GPIO pins can’t sink enough current to run the IR LED bright enough to reach the DVR, so it’s necessary to use a transistor to switch current from the 3V3 pin (3.3 volts) on the Raspberry Pi.
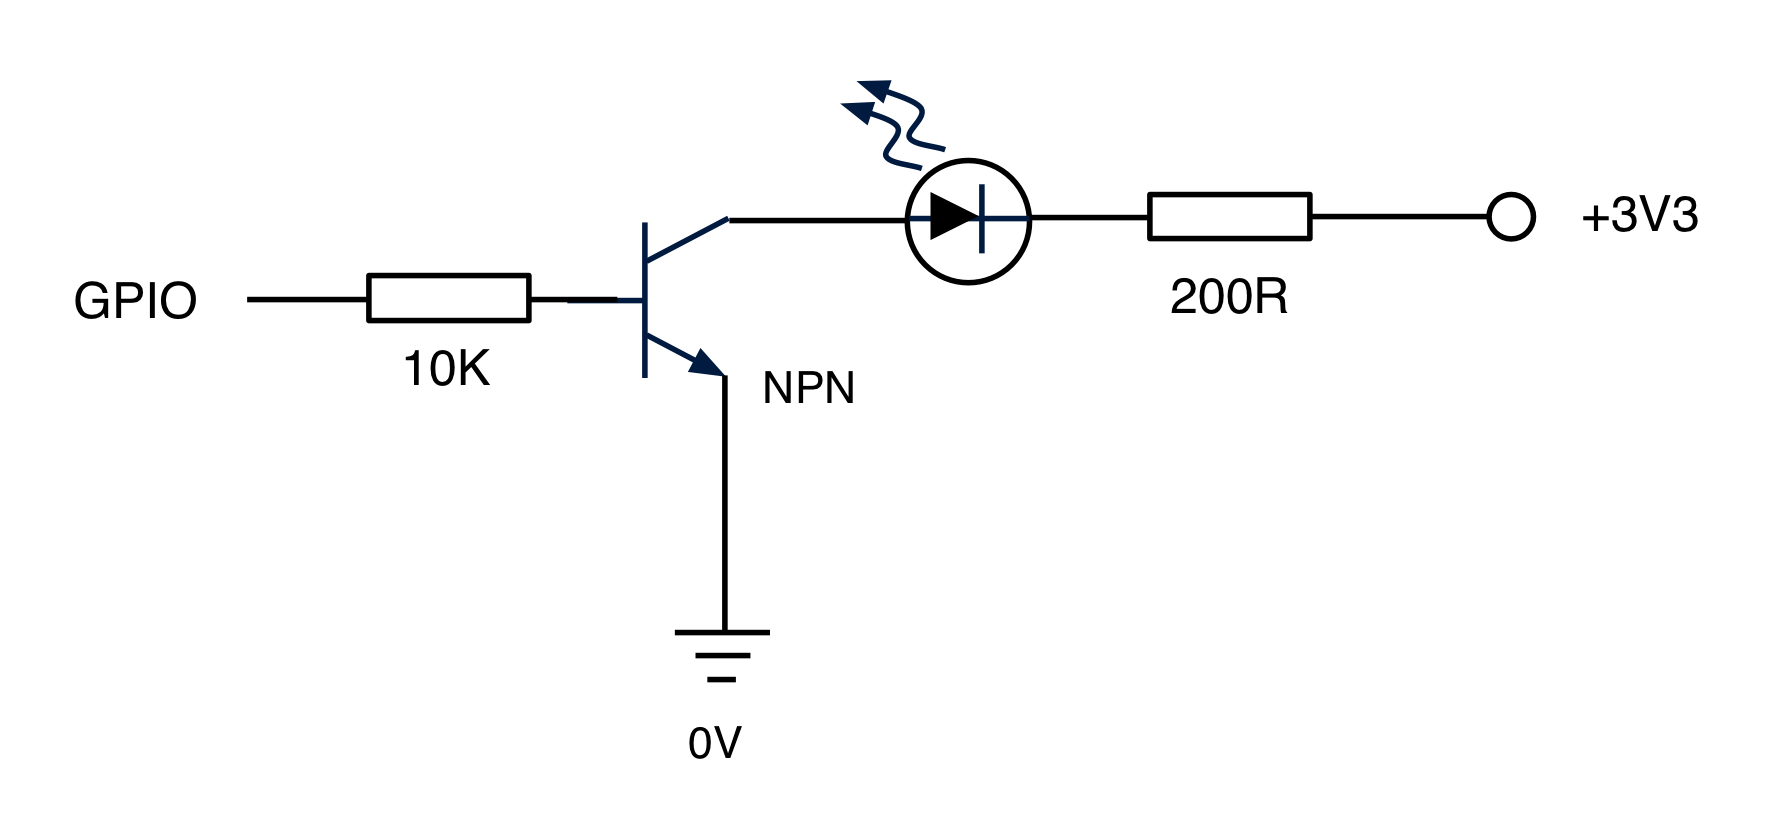
In this setup, when the GPIO pin is energised, current (limited by the 10K resistor) flows into the base of the transistor to ground, switching the transistor, allowing current to flow through the 200Ω resistor and the IR-emitting diode to ground. When the current flowing into the base ceases, the transistor changes state again and current is prevented from flowing through the diode. This circuit effectively amplifies the “signal” on the GPIO pin, allowing it to drive the IR-emitting diode.
With regards to the software stack on the Raspberry Pi, I’m running Debian Wheezy with a few packages installed:
- lirc - The Linux Infrared Remote Control system - a toolkit for sending and receiving IR codes under Linux.
- apache2 + php - A common combination of web server and scripting language.
lirc is set up to send IR codes on GPIO 17. The configuration file for lirc specifies the Infrared Remote code values and their names for the remote. This was created through a tedious operation of recording the values produced by each button on the remote.
lirc then allows you to simply send IR codes from the command line:
$ irsend SEND_ONCE DVR STAND_BY
for example, would send the Stand By (STAND_BY) remote code. I use a PHP script to invoke these commands automatically when HTTP requests are received from the Arduino.
Conclusion & Ideas
I’ve yet to test it, but on the desk it works great. It’s all very hacky at the minute, but with a little modification, the solution could be generalised to implement support for multiple remotes/devices. Maybe even a web interface could be hosted by the Raspberry Pi to allow web clients to control the DVR too.
Rather hilariously it’s also possible to get the system in a loop with them in close proximity: the receiver receives a code, sends it to the transmitter, which sends it to the receiver which… You get the idea. Easily amused.
Until next time, stay geeky!